A lecturer, or other users with the update course settings capability, can change course settings.
Guide on how to edit your course settings.
Step 1 : Click on the "View Course" button located under the module's name in either your Dashboard or My Courses. This action will redirect you to the main page of the respective module.
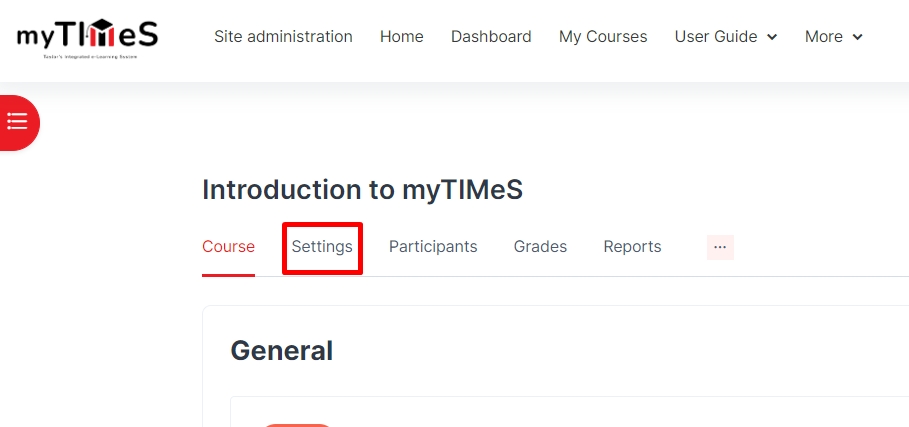
Step 2 : At the tab navigation. click the "Settings" to edit the course.
Step 3 : Update the Module Information
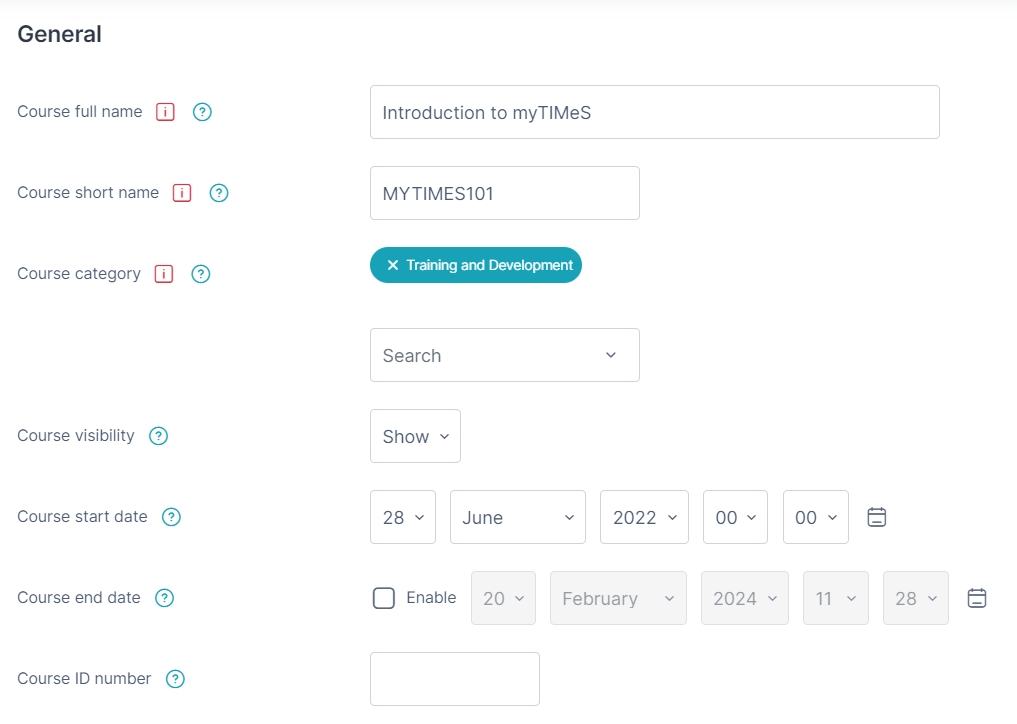
Under the "General" section, most of the fields data are sync from CMS. You can edit the Course full name.
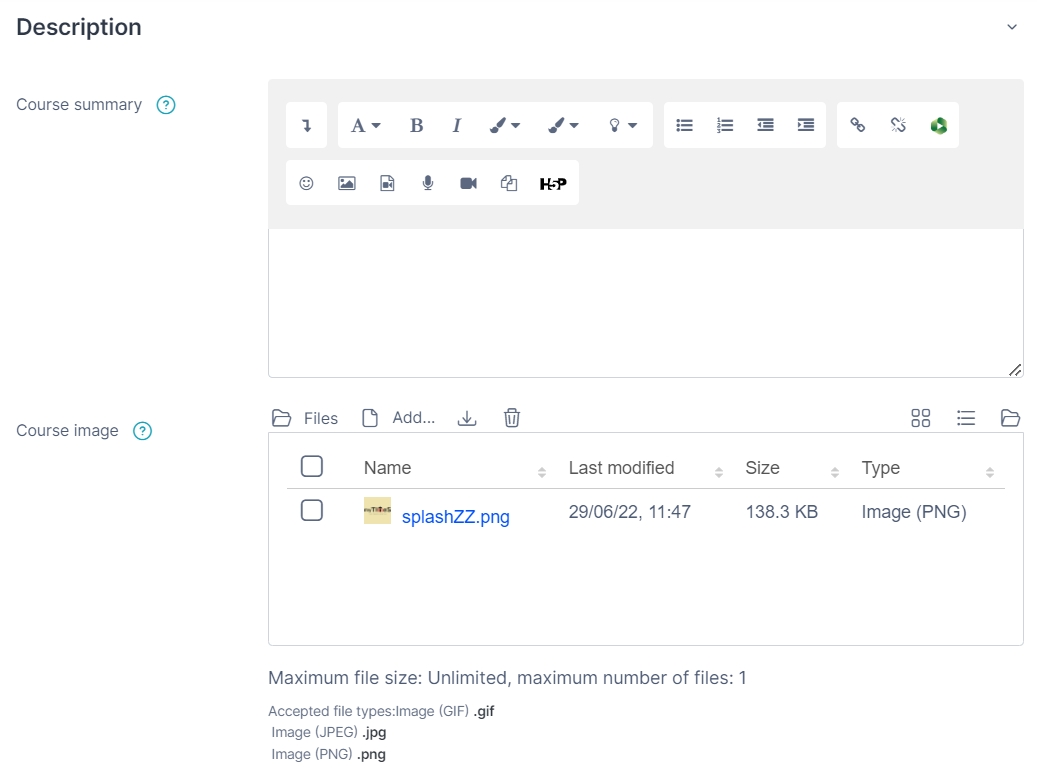
Under the "Description" section.
a. Course summary
- The summary appears on the course listings page. This field is searched when searching for a course and also appears in the Course/Site description.
b. Course image
- The course image is displayed in My courses and in the list of available courses on the Homepage. A course image adds visual interest and makes your course more inviting. The recommended image size is 400 px * 300 px.
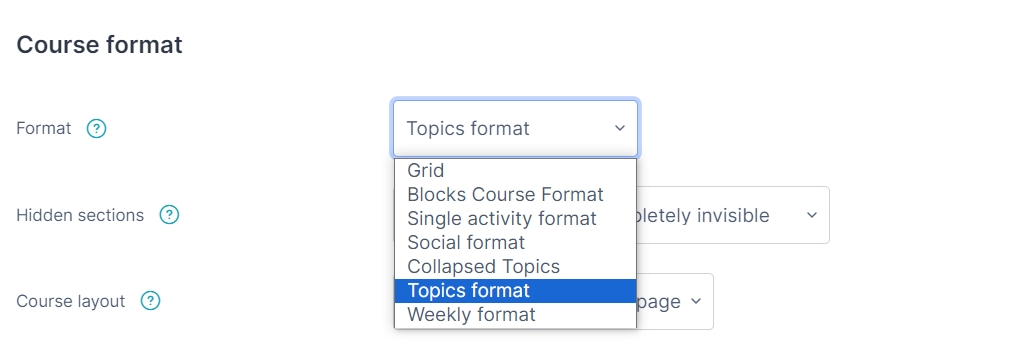
Under the "Course format" section.
a. Course Format
- The course format determines the layout of your course homepage. The default format is "Topics". You may click
 to read more about the available course formats description.
b. Hidden sections
- This option allows you to decide how the hidden sections in your course are displayed to students. By default, a small area is shown (in collapsed form, usually grey) to indicate where the hidden section is, though they still cannot actually see the hidden activities and texts.
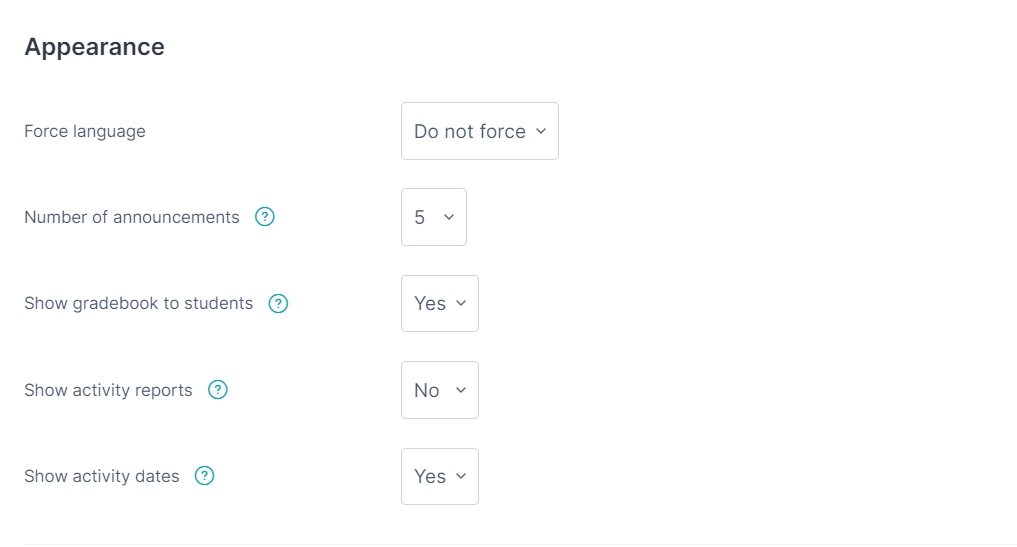
Under the "Appearance" section.
a. Force language
- If you force a language in a course, the interface of myTIMeS in this course will be in this particular language, even if a student has selected a different preferred language in his/her personal profile.
b. Number of announcements.
- How many recent announcements from the Announcements forum should show in the Latest announcements.
- If an announcements forum is not required in the course, this setting should be set to zero.
c. Show activity dates
-
Show activity dates on the course page. By showing the activity date on the course page, students can keep a sense of their progress, know what they need to focus on next and organize their time to meet all deadlines.
Under the "Files and uploads" section.
a. Maximum upload size
- The maximum per file size allowed for student uploads to the course. Default size is 50mb. You can further restrict the maximum upload size for each activity.
Under the "Completion tracking" section.
a. Completion tracking
- Default setting is No. Update it to "Yes" to enable the completion tracking. You can set conditions for activity completion or course completion in each resource or activity. Course completion criteria may also be based upon Activity completion values found in the activity's settings.
b. Show activity completion conditions
- Show activity completion conditions on the course page. With the new Student Activity Completion feature, students can easily view the criteria for completing upcoming activities, including their opening and due dates. This helps students track their progress, identify completed tasks, and efficiently plan their time to meet deadlines.
![]()
Under the "Groups" section.
a. Group mode
- Here you can define the group mode at the course level by a pulldown menu. "No groups", "Separate groups" and "Visible groups" are the choices. The selected setting will be the default group mode for all activities defined within that course. The group setting can affect what users see in the participant's list and who they can interact with within activities.
b. Force
- If the group mode is "forced" at a course level, then this particular group mode will be applied to every activity in that course. This will override any activities that may have a special group setting.
c. Default grouping
- If groupings are enabled, a default grouping for course activities and resources may be set.
Under the "Role renaming" section.
- You can rename the roles used in your course.
Step 4 : Click "Save and display" to save the changes and back to the module.
