After the Turnitin assignment closing date, lecturers can grade and leave feedback on students’ submissions via Turnitin Feedback Studio. Students are able to access the grades, comments, or requested changes noted by lecturers after the post date.
Turnitin Feedback Studio contains several grading tools that lecturers can use in grading and assessing papers:
- QuickMarks Manager
- QuickMarks comments
- Bubble comments
- Inline comments
- Strike
- Feedback Summary
- Voice comments
- Text summary comments
- Rubics
The online grading toolbar is located on the Turnitin Feedback Studio right-hand side.

To start grading the Turnitin assignment,
Step 1 : Go to your module page.
Step 2 : Click on the Turnitin assignment activity, and the students' submission will be shown on the page.

Step 3 : Click on the similarity % next to the student, and the Turnitin Feedback Studio will open in another tab.

Grade with QuickMarks
QuickMarks comments (from library)
Step 1 : Click on the QuickMarks icon from the online grading toolbar.
Step 2 : Select a specific set or use the search box to search for a specific QuickMarks.
Step 3 : Drag and drop the QuickMarks from the panel into the relevant part of the paper.

To leave a comment together with your QuickMarks:
Step 4 : Click your QuickMarks title on the paper.
Step 5 : Click on the Add comment to begin typing.
Step 6 : Click outside of the comment to save your comment.
Step 7 : To delete a comment, click the trash can icon in the bottom left-hand corner of the QuickMarks box to delete it.

QuickMarks comments (directly)
Step 1 : Click on the paper or select the part of text you would like to associate the QuickMarks with & click the QuickMarks icon.

Step 2 : Select a specific set or use the search box to search for a specific QuickMark.
Step 3 : Choose your preferred QuickMark to leave it on the paper.

To leave a comment together with your QuickMarks:
Step 4 : Click your QuickMarks title on the paper.
Step 5 : Click on the Add comment to begin typing.
Step 6 : Click outside of the comment to save your comment.
Step 7 : To delete a comment, click the trash can icon in the bottom left-hand corner of the QuickMarks box to delete it.

Bubble comments
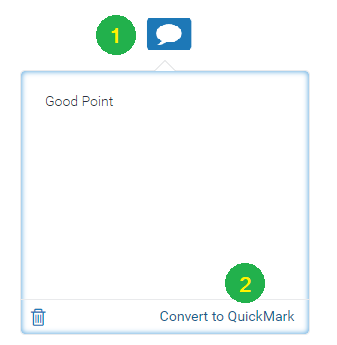
Step 1 : Click on the paper where you would like to leave your comment, then click the speech bubble comment icon.
![]()
Step 2 : Enter your comment in the Add Comment
Step 3 : Press outside the comment box to save your text.
Step 4 : To delete the comment, click the blue bubble comment icon and click the trash icon in the bottom left-hand corner of the comment box to delete it.

Convert a Bubble Comment to a QuickMarks
To reuse the bubble comments into this assignment or other assignments, you can convert them into a QuickMarks.
Step 1 : Click the blue bubble comment.
Step 2 : Click Convert to QuickMark in the bubble comment box.

Step 3: Give a title and assign the QuickMark to a specific set, then Click the Save button.
Inline comments
Step 1 : Click anywhere on a paper & choose the T icon from the in-context marking tool, and type your comment. The inline comment will appear on the paper.

Step 2 : You can move a comment by clicking and dragging it to anywhere on the paper.
Step 3 : To delete the comment, hover over and click the trash icon that appears above the comment.

Grade with Feedback Summary
Voice comments
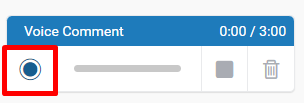
Voice comment can be recorded using your computer's microphone and it's up to three minutes long.
Step 1 : Click on the Feedback Summary icon from the online grading toolbar.

Step 2: Click the Record button to start voice recording.

Step 3 : Click Pause to pause the voice recording temporary or click the record button to continue.

Step 4 : Click Stop to stop the voice recording after you have finished.

Step 5 : Click Trash icon to discard the voice comment.

Text Comment
Text Summary Comment is used for providing overall feedback on a paper.
Step 1 : Click on the Feedback Summary icon from the online grading toolbar.
Step 2 : Enter the comment into the text comment box and the comment will automatically be saved.

Grade with Rubrics
There are two ways to grade with a rubric or grading form.
- From side panel
- From the full-size rubric/form viewer
From the side panel
Step 1 : From the online grading toolbar, select the rubric icon to open the Rubric/Form side panel.

Note: You must attach a rubric or grading form to this assignment before you can grade the assignment. Please refer HERE for how to create rubrics and grading form.
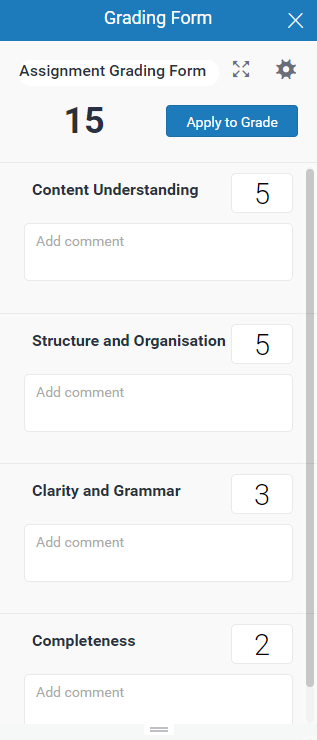
Step 2 : The criteria for your rubric or grading form will appear in the panel.
- For rubrics, you can set the score for each criteria using the sliders. Select and drag the slider to the assigned score.

- For grading forms, you can add comments to the comment fields and set a numerical score (if enabled on the form template).

- Once you have set your scores, click Apply to Grade at the top of the side panel.
From the full-size view
The full-size view displays your rubric or form in a separate window and allows you to grade papers more efficiently. The student you are currently grading can be seen in the top right-hand corner of the expanded view. You can navigate to other students using the standard navigation options and continue to grade each student that has submitted to the assignment.
Step 1 : Click on the Rubrics icon from the online grading toolbar.
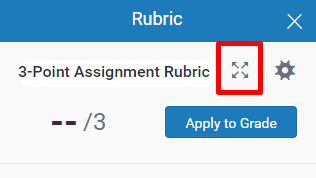
Step 2 : Select the four arrows icon at the top right of the rubric or grading form title.

Step 3 : Grade the submission.
- For rubrics, select a criterion description to give your students a score for that area.
- For grading forms, you can write comments and assign scores (if enabled in the form template) to each criterion.
Step 4 : When finished, click Apply to Grade at the bottom right.
