
The Lesson activity allows lecturers to create 'branching' exercises where students are presented with content and then, depending on their responses, are directed to specific pages. The content may be text or multimedia.
Ideas for using Lessons
Self-directed learning of a new topic
- Use the lesson to introduce a new topic. The student starts out knowing nothing but can progress at his own pace, reviewing what he is not sure of and moving on when he feels ready. This can be much enhanced by..
Allow for different learning styles
- When using the lesson to introduce a new topic, offer pages that deliver the content in different ways, according to how the students prefer to learn. For example, the button "do you prefer to read?" goes to a page of text; "do you prefer to watch a video?" goes to a screencast ; "do you prefer to listen to instructions?" -goes to a podcast and so on.
Role play simulations/Decision-making exercises
- Use the lesson to set up situations where the student has to make a choice each time and the scenario changes according to their selection. This could be a medical emergency for example, deciding upon the correct treatment, or a customer relations exercise, learning how best to deal with an awkward client. In an educational establishment it could serve well in Humanities subjects considering moral/ethical issues.
Interactive fiction
- For younger (and not so younger!) students, the lesson can be used to create a "choose your own ending" type of story where the student reads a page (or even watches a video/listens to an audio file) and then decides upon the character's next move. Apart from the entertainment value of this, it could be used to help guide pre-teens to behave responsibly by taking decisions for a character who is in a potentially dangerous situation.
Differentiated revision guides
- Students can be taken to different sets of revision questions according to their answers, allowing them to progress from basic to intermediate to advanced according to their prior knowledge
Getting Started
There are two basic items lecturer can create within a Lesson.
- Content Pages – can include text, videos, images, links, and more for students to learn.
- Question Pages – multiple choice, matching, numerical, short answer (fill-in-the-blank), true/false and essay (must be manually graded).
Before starting, we recommend you to use paper or a digital sketching tool to plan out your lesson. In the sketch, include the content pages, question pages, and lines showing how these different pages will connect.

How is it set up?
Step 1 : Adding a Lesson activity
- Toggle on the 'Edit mode' at the top right of your module page.
- Locate the Section where you want to add the Lesson activity and click "+ Add an activity or resource".

- Key in "Lesson" in the search box and the Lesson activity will be displayed. Click on the Lesson icon and the Adding a new Activity page will open.

- Fill in the name for your lesson and a description. (The description will display on every page of the Lesson.)
- For Progress bar select Yes.
- For Display left menu select Yes.
- Expand the other sections to select the settings you want (availability, flow control, grade) including whether the Lesson is for practice or will be graded.
- Click Save and Display to add your first page.
Step 2 : Adding Content Page
- Click on the Add a content page link to create your first page.

- Enter the Page title for your first page.
- Enter the Content for your first page.

Step 3 : Adding Navigation Button
The page needs to have navigation buttons for students to move to the next page.
- Under the Content 1 heading, at the Description field, enter the word ‘Next’ and at the Jump drop-down menu, select Next page.
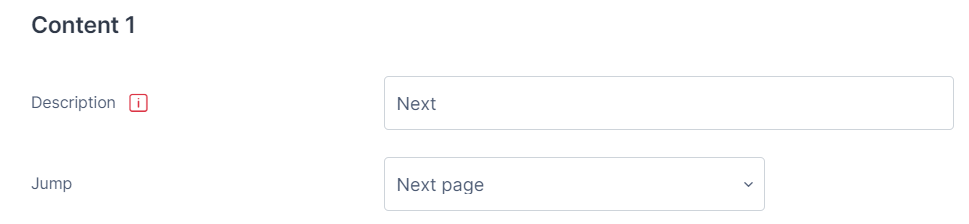
- For the lesson first page, you do not need to enter a previous button so you can leave the rest of the options as default and click the Save page.
Note:
On subsequent pages, please add a previous button so that the students can navigate back through the lesson.
For the Previous button to appear on the left of the page, please enter the word ‘Previous’ in the Description field under Content 1 and select ‘Previous page’ from the Jump drop-down menu.
For the Next button to appear on the right of the page, please enter the word ‘Next’ in the Description field under Content 2 and select ‘Next page’ from the Jump drop-down menu.

Step 4 : Adding Question Page
- From the Action drop-down menu, you can select the action for creating the next content page or question page.

- Click on ‘Add a question page” link to add questions.
- The Select a question type menu gives you the choice of Essay, Matching, Multichoice, Numerical, Short answer or True/False.
- Choose one question type and click ‘Add a question page’ button.

- Enter the Page title for your question title (e.g. Question 1).
- Enter the question text in the Page contents. You can also add images to the question.

- Enter the Answers For a correct answer ensure that there is an associated score and that an incorrect answer has a score of 0.
- Finally click Save page.
Repeat step 2 - step 4 to create all content pages and question pages. Please make sure to title them in a descriptive way, so you will know which pages to choose when you edit the jumps.
Please see the image below for a sample lesson.

Tutorial Video: Lesson: Adaptive Learning