
Introduction
The Quiz is a very powerful activity that can meet many teaching needs, from simple, multiple-choice knowledge tests to complex, self-assessment tasks with detailed feedback.
- The questions may be in sentence or number form or contain various media such as video or sound.
- They do not all need to be the same type of questions: a quiz may contain multiple-choice matching, true-false, essays (manual grading), calculated and more.
- Feedback may be given at any or all stages of the process.
- Questions are created and stored separately in a Question bank and can be reused in different quizzes.
- When creating a Quiz you can either make the questions first and add them to the Quiz, or add a Quiz activity (as below) and create the questions as you go along.
Create Quiz
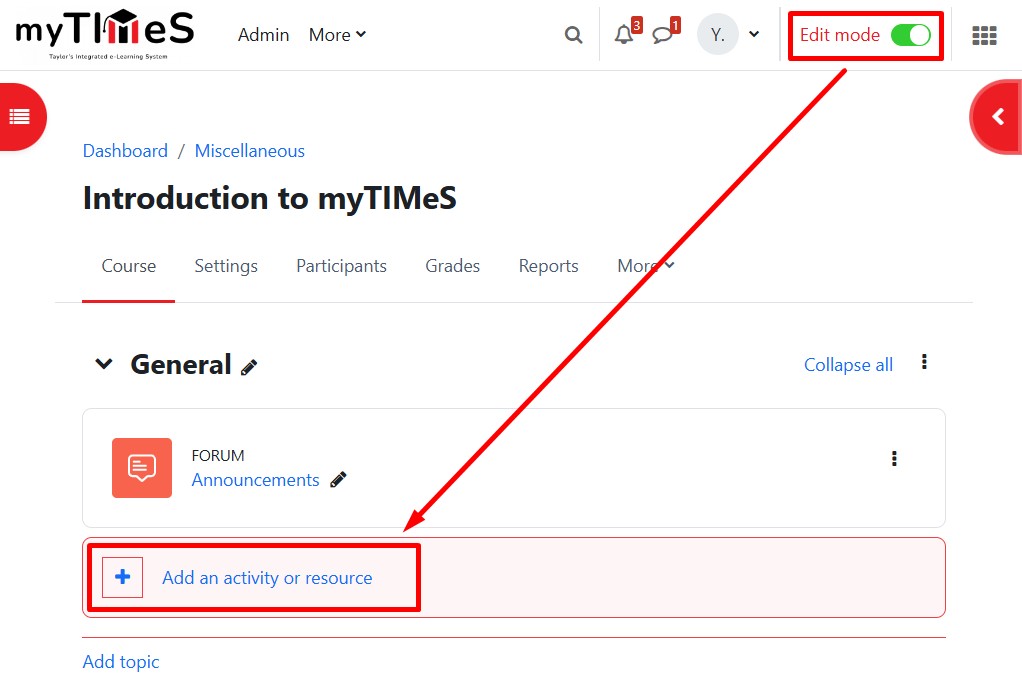
Step 1 : Toggle on the "Edit mode" at the top right of your module page.
Step 2 : Locate the Section where you want to add the Quiz activity.
Step 3 : At the bottom of the Section, click "+ Add an activity or resource".
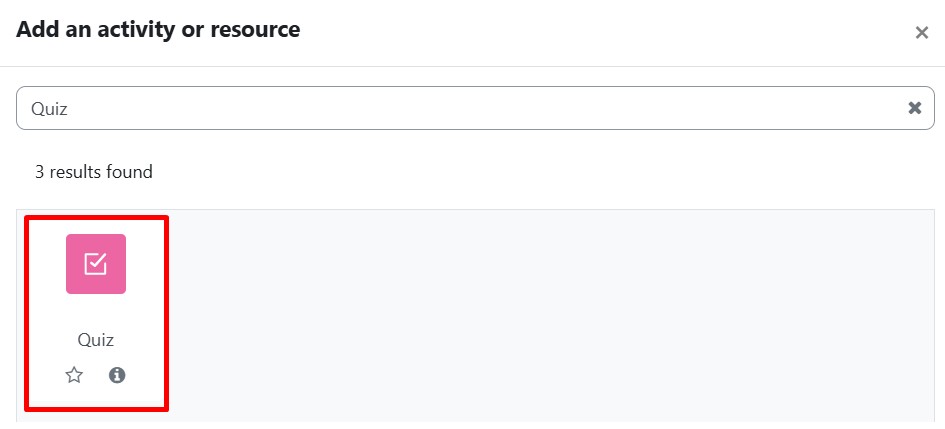
Step 4 : Key in "Quiz" in the search box and the Quiz activity will be displayed. Click on the Quiz icon and the Adding a new Activity page will open.
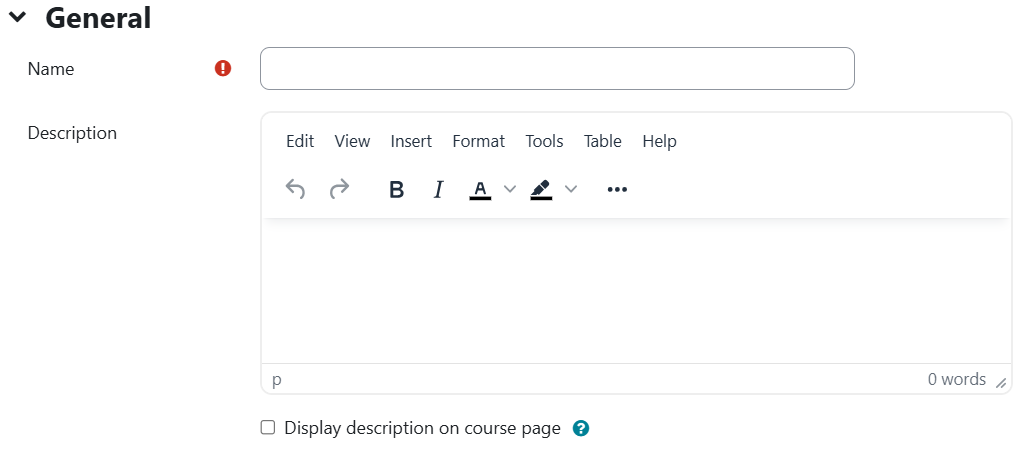
Step 5 : Update the Quiz Information.
Under the "General" tab:
a. Name
- Fill in the name for your quiz. (This will appear as the link on your module page)
b. Description
- Put in the information about the quiz or the instruction for the students.
c. Display description on course page
- Tick the box to display the description under the link.
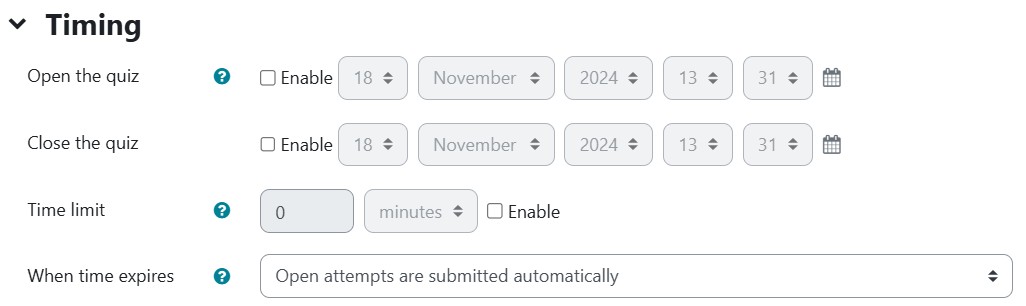
Under the "Timing" section:
a. Open the quiz
- Put in the quiz start date and time.
b. Close the quiz
- Put in the quiz due date and time.
c. Time limit
- If enabled, the time limit is stated on the initial quiz page and a countdown timer is displayed in the quiz navigation block.
d. When time expires
- The settings controls what happens if a student fails to submit their quiz attempt before the time expires. If the student is actively working on the quiz at the time, then the countdown timer will always automatically submit the attempt for them, but if they have logged out, then this setting controls what happens.
-
Options Description Open attempt are submitted automatically * Default Students' answers will be submitted automatically when time's up. Attempts must be submitted before time expires, or they are not counted Students must submit their answers before times end otherwise it will not be counted. There is a grace period when open attempts can be submitted but no more questions answered. Students will be given time to submit their answer after the time expires.
Under the "Grade" section:
a. Grade to pass
- This setting determines the minimum grade required to pass. The value is used in activity and course completion, and in the gradebook, where pass grades are highlighted in green and fail grades in red.
b. Attempts allowed
- Set the number of attempts allowed
c. Grading Method
- To calculating the final quiz grade when multiple attempts are allowed.

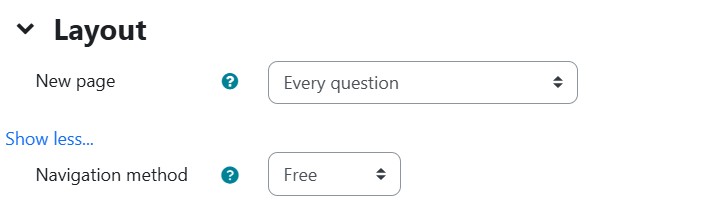
Under the "Layout" section:
a. New page
- By default, every new question will be displayed on a new page.
- For longer quizzes, we recommend to stretch the quiz over several pages by limiting the number of questions per page, e.g. Every 5 questions per page. When adding questions to the quiz, page breaks will automatically be inserted according to this setting. You may move the page breaks manually later on the question editing page.
b. Navigation method
- Free (Default) - Students are able to navigate freely through the quiz.
- Sequential - Students must progress through the quiz in order and may not return to previous pages nor skip ahead.
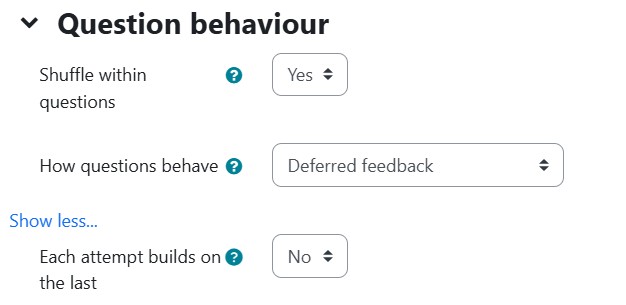
Under the "Question Behaviour" section:
a. Shuffle within questions
- By default, the setting is "Yes". The parts making up each question will be randomly shuffled each time a student attempts the quiz, provided the option is also enabled in the question settings. This setting only applies to questions that have multiple parts, such as multiple choice or matching questions.
b. How questions behave
- This is the primary way to control the experience a student has as they interact with each question in the quiz.
- Deferred feedback (Default) - Students will receive their feedback after they finish the quiz.
- Immediate feedback - Students will receive feedback immediately after answering the quiz.
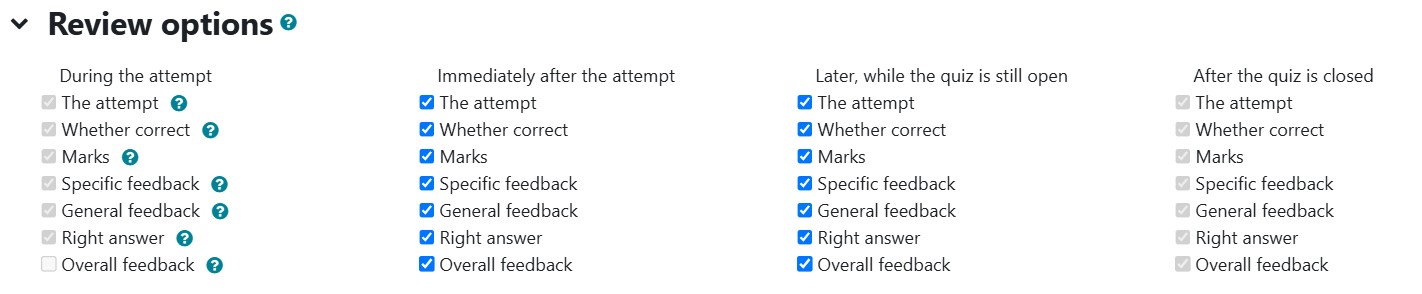
Under the "Review options" section:
These options control what information students can see when they review a quiz attempt or look at the quiz reports. Please click the ![]() to read more information about the option.
to read more information about the option.
Under "Restrict Access" section:
This feature enables lecturers to restrict the availability of any activity or even a course section according to certain conditions such as dates, grade obtained, group or activity completion.
Under "Activity Completion" section:
This feature allows teachers to set specific criteria for determining when an activity or resource is considered complete.
Step 6 : Click "Save and display" to save the changes.
Step 7 : Click "Add Question" to go to "Editing Quiz" page.
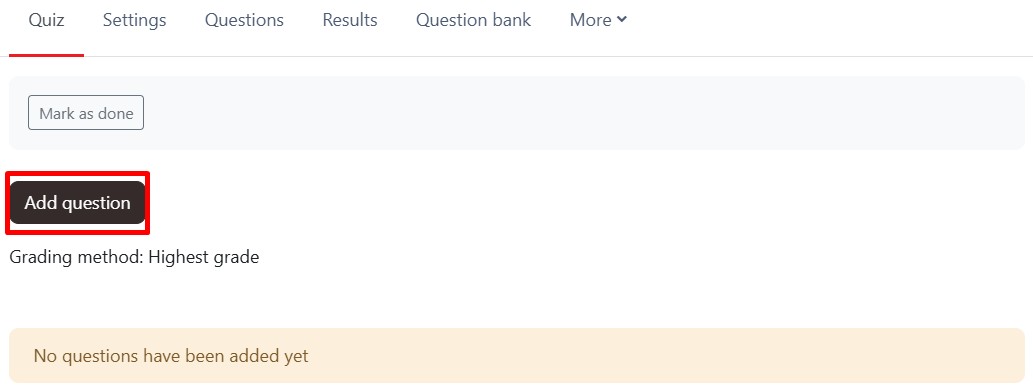
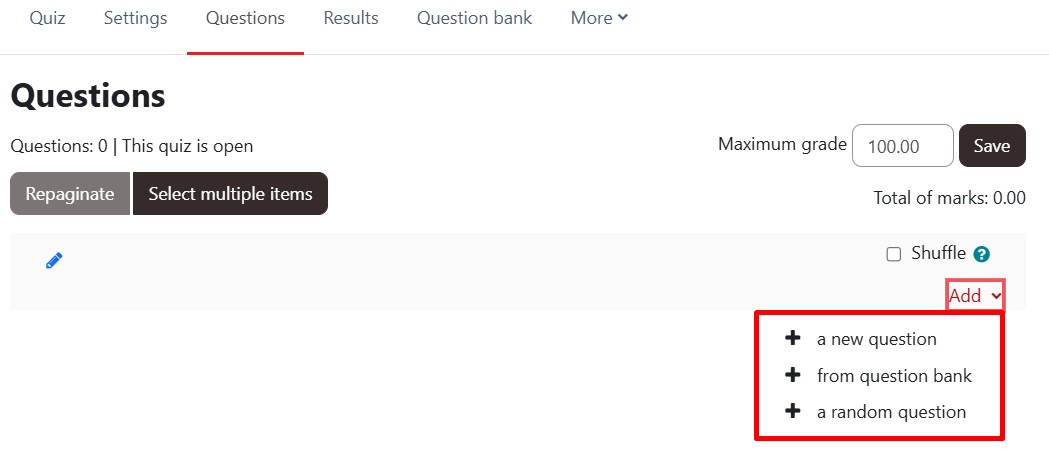
Step 7 : On the Editing quiz page, select the source of your questions.
- Choose a new question if you want to create the questions from scratch.
- Choose from question bank if you have prepared the questions in question bank.
- Choose a random question if you already have questions in question bank and you want to randomize the questions.
Step 8 : Insert the questions for the quiz, and you are ready to go.
Reference: https://docs.moodle.org/401/en/Quiz_settings