All types of files can be uploaded and accessed through myTIMeS, but the student needs to have the correct software to be able to open them. Different file types are shown with different icons. Files may be added to your module in two ways:
- Drag and drop
- Add an activity or resource menu
Drag and drop
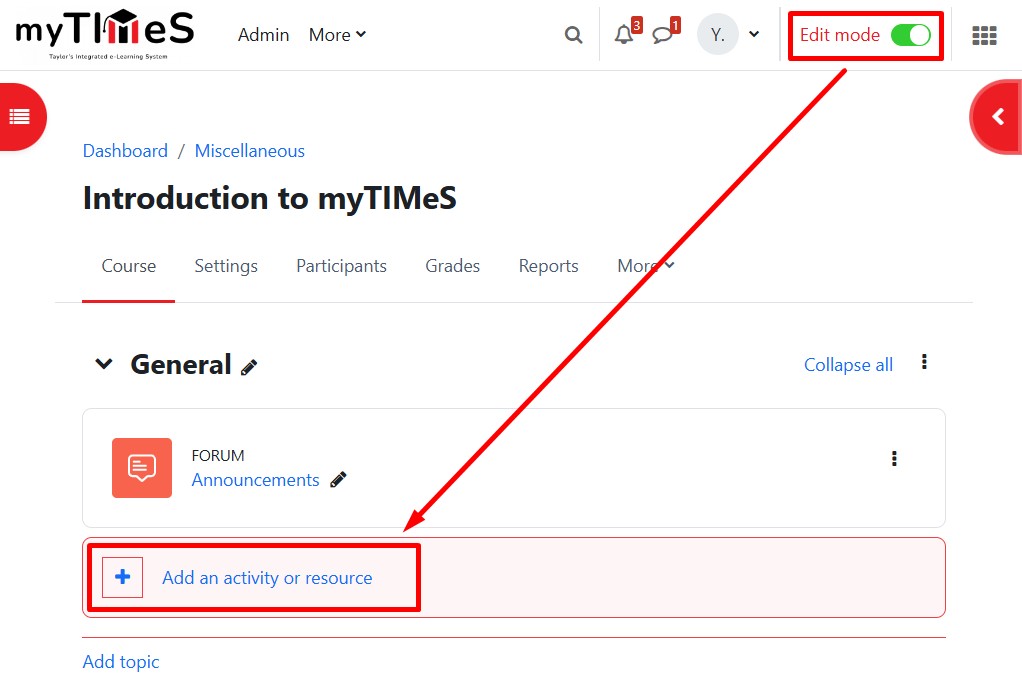
Step 1 : Toggle on the "Edit mode" at the top right of your module page.
Step 2 : Locate the Section where you want to add the File.
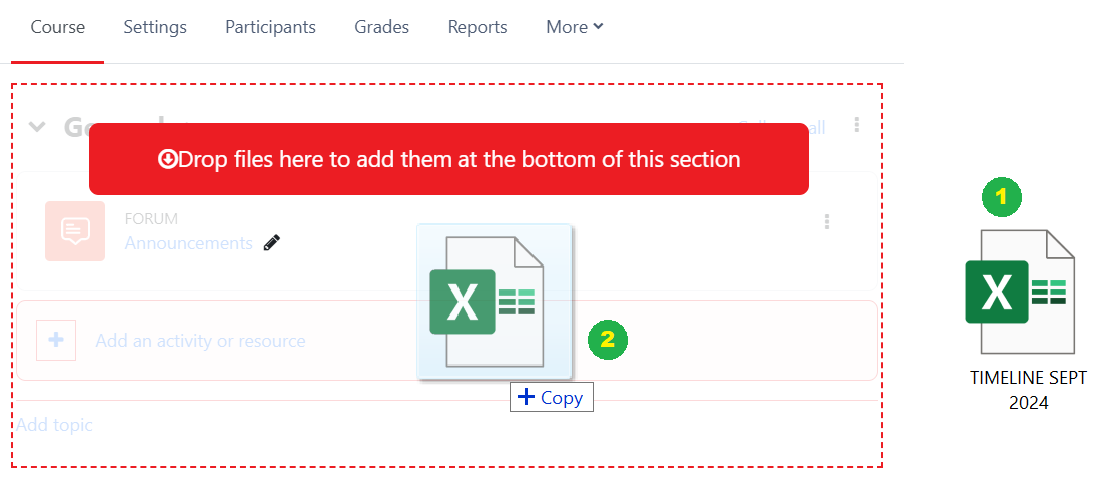
Step 3 : Click and hold the file (1 below) from File explorer, drag it to your chosen section (2), and release.

Step 4: The file will upload and display (3):

Add an activity or resource menu
Step 1 : Toggle on the "Edit mode" at the top right of your module page.
Step 2 : Locate the Section where you want to add the File.
Step 3 : At the bottom of the Section, click "+ Add an activity or resource".

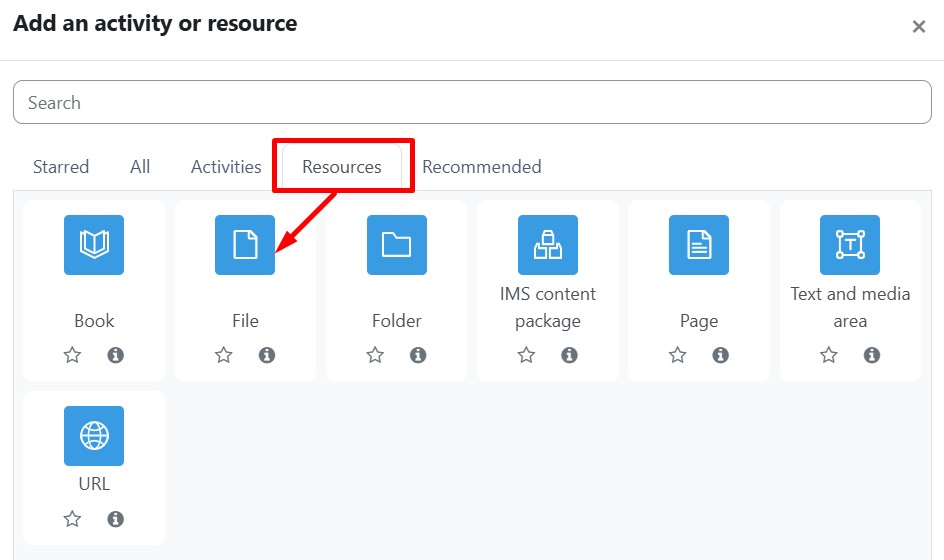
Step 4 : Go to the Resources tab, click on the File icon and the Adding a new File page will open.

Step 5 : Enter the file Name and, if required, a description, checking the box if you want the description displayed on the mode page.
Step 6 : Select files either by drag and drop or file picker pop up.
Step 7 : Expand the Appearance settings to select, for example, whether to show students its size, type and date uploaded and how you want the file to display.
Step 8 : Click Save and return to course to save the changes and return to the module.
